
Want your outdoor trampoline to perform safely?Summer is around the corner, are your ready? Assembling trampoline springs can be a tricky process, but with the right tools and techniques, it can be done easily and safely. Whether you're a first-time installer or replacing old springs, this guide ensures perfect assembly.
Before you begin, you should know:
- ⏱️ Time: 30-45 minutes
- 📊 Difficulty: Moderate
- 👥 People needed: 1 (2 is better)
Gather your tools
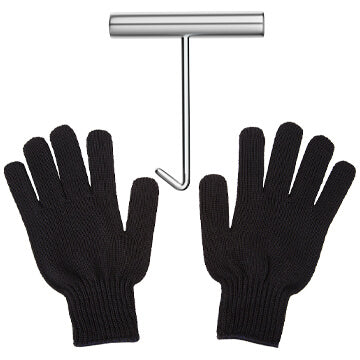
You will need a trampoline spring tool, which can be purchased online or from a sporting goods store. You'll also need a pair of pliers and a friend to help you. If you purchase a jumpfly trampoline, you don't need to worry about the installation tools, as all jumpfly trampolines are come with installation tools:
- ✓ Spring pulling tool (T-hook)
- ✓ Work gloves
- ✓ Pliers (optional)
- ✓ Helper (recommended)
Connect the spring to the frame
Take one end of a spring and insert it into the first spring hole on the trampoline frame. Use your trampoline spring tool to hook the spring onto the trampoline frame.
Layout the jumping mat inside the circle frame. Make sure the logo is facing UP. Insert one end of the spring in the triangle ring of the jumping mat and the other end pull it with the spring tool and insert it into the frame hole.
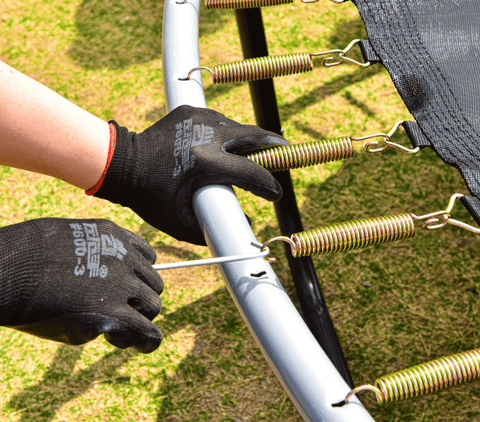
Start installing the springs in an X shape. The tension needs to be distributed evenly for the net to be installed correctly. Gently tap down against the springs if the hook is not completely the hole. Springs will create high levels of tension when assembled. Please take care not to pinch your fingers.

Repeat
Continue connecting springs to the trampoline frame and mat, working your way around the trampoline. Be sure to connect the springs evenly, so that the tension is distributed evenly across the trampoline mat.
Weather tips & seasonal care
Weather Tips:
- If installing in cold weather, store springs at room temperature before installation
- Choose a dry day for installation - wet or icy conditions can make tools slippery
- Consider installing in your garage if weather is unfavorable
Seasonal Care:
- Check spring tension monthly, especially after temperature changes
- Apply rust-prevention spray before wet seasons
- Consider a trampoline cover to protect springs from rain and snow
- Remove any ice buildup before use in winter
Location Tips:
- For outdoor installation: Choose a dry, calm day
- For indoor installation: Ensure adequate ceiling height and ventilation
- Consider temporary indoor setup during harsh weather months
Pro Tips
- Count springs before starting to ensure you have the right number
- Install in a cross-pattern for even tension
- If spring is difficult to attach, don't force it - check alignment
- Take breaks if needed - it's normal for installation to be physically demanding
💡Maintenance Reminder: Check spring tension monthly and look for any rust or wear. Replace damaged springs immediately to maintain safe bouncing conditions.
Common Issues
- Springs too tight? → Start with the cross pattern method
- Spring won't seat properly? → Check hole alignment
- Mat seems uneven? → Recheck spring distribution
- Spring tool slipping? → Ensure proper grip technique
Double-check
Once all of the springs are connected, double-check to make sure they are all securely attached to both the frame and the mat.
✓ Final Checklist:
- □ All springs are fully seated
- □ Mat tension is even
- □ No springs are crossed or twisted
- □ Frame is stable and level
- □ All connections are secure


Leave a comment
All comments are moderated before being published.
This site is protected by hCaptcha and the hCaptcha Privacy Policy and Terms of Service apply.